Contents
- Product Page
Quick Start
Step One - Prepare Documents for Scanning
Prepare some documents to be scanned the same way they will be prepared in production. For instance if they are going to be separated with blank pages, insert blank pages. In this example multiple length invoices are going to be scanned with the use of blank pages for file separation.
Step Two - Setup Scanning
Are they going to be scanned with a network copier?
If YES, setup a destination with the images being scanned as tiff images at 300 dpi and G4 compression. G4 compression is also know as fax compression and black and white. Do not scan in color or gray scale. Once setup scan the sample file into the input folder. Go to Step Three.
If NO, Start by turning on the scanner - the software needs to find it and it has to be on to do so.
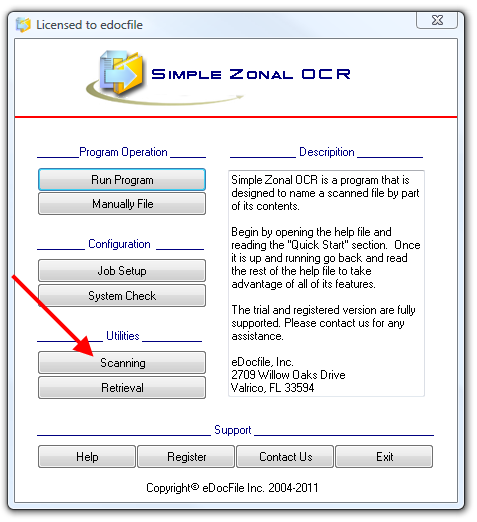
Click on "Scanning"
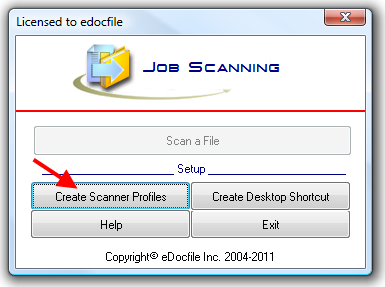
Click on "Create Scanner Profiles"
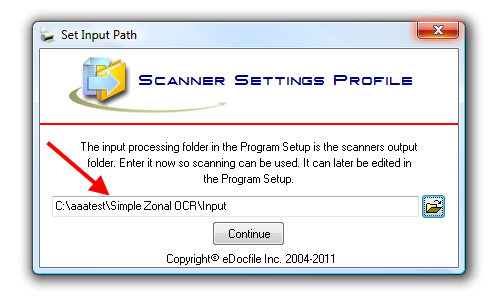
Since this is the first time the program has been run the user will be prompted to set an output folder for scanning. This Window will only appear if no path has been set. Since the scanning output path is the input for processing, to change the path in the future it is done in "Settings". Keep in mind the software works by processing files in a folder and can be used with a copier.
Enter the output path (input for processing files) and click on "Continue"
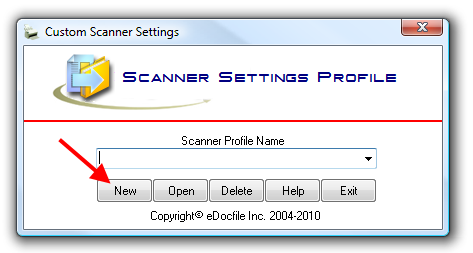
Click on "New"
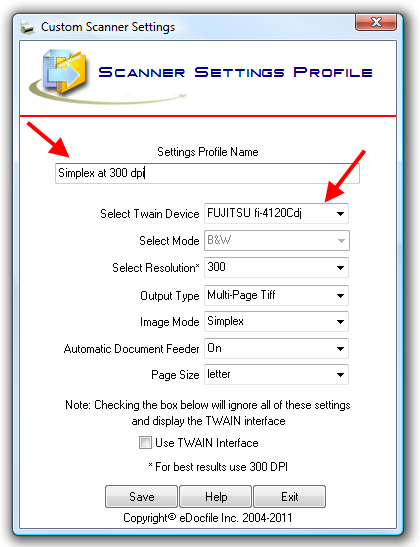
The Scanner Settings Profile Window will open. Enter a Name for this profile and select the scanner and settings to use. More on the settings are in the "Scanning the Image section". The settings show above will create a multi-page tiff image, with only the front sides of the pages "Simplex" at 300 dpi. Multi-Page Tiffs were selected as the files are going to be split with blank pages.
Click on "Save" when finished
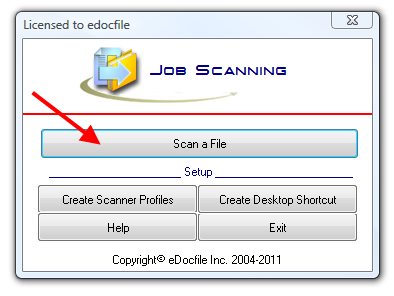
Place the paper in the scanner and click on "Scan a File"

The scanner interface will not open, paper will just go through the scanner. When the paper is finished going through and if there were no double feeds or paper jams, click on "Yes" to place the file in the input folder for processing. If it did not go through correctly, click on "No" and rescan the file.
Step Three - Job Setup
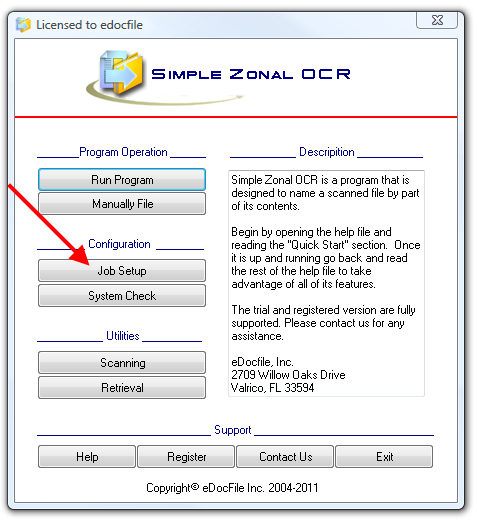
From the Main Menu click on "Job Setup"
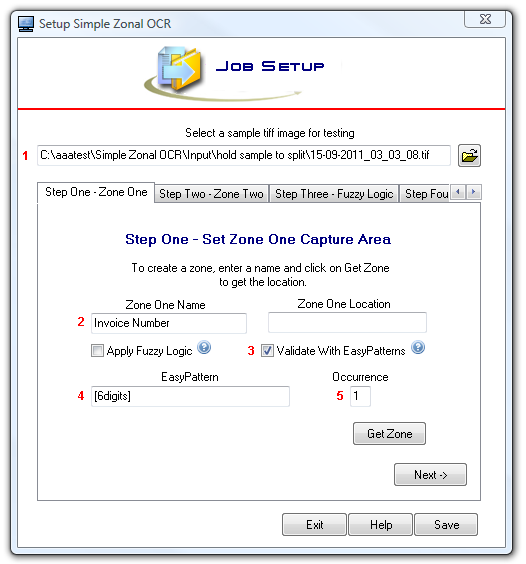
Note: the Job Setup is broken down into 5 steps (the tabs below the sample file), since this is just a Quick Start Guide details about all the selections made in each section will be skipped.
1 - Browse to the sample file
2 - Enter a name for the Zone
3 - Place a check mark in "Validate with EasyPatterns" help with EasyPatterns can be called up by clicking on the quesition mark
4 - Enter the EasyPattern, in this case it is a 6 digit number so "[6digits]" is the pattern.
5 - Enter the occurrence of the EasyPattern, in this case it would be the first 6 digits so 1 is entered.
3 - Click on "Get Zone" to open the sample file and select the area to OCR
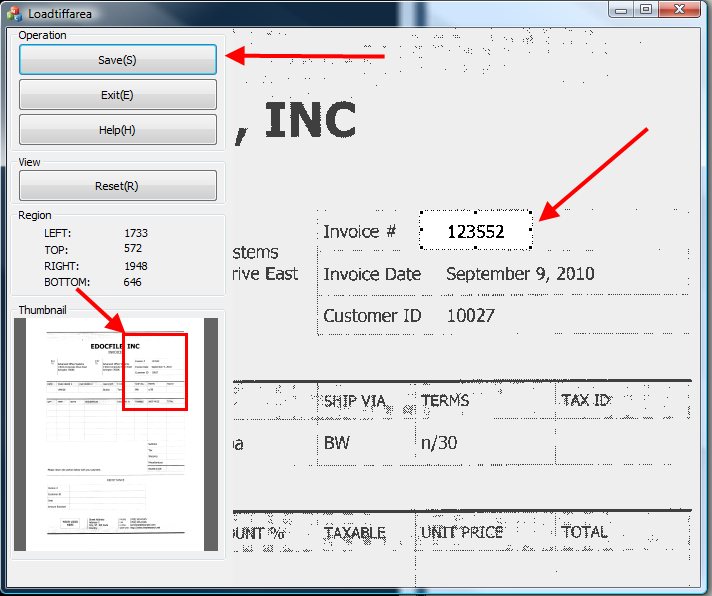
The scanned image will open in a viewer. To zoom in on a section use the mouse wheel, to move the area drag the red box on the left side, Once the area can be clearly seen, Start at the top left of the area to be captured, press the left mouse button and drag the cursor to the bottom right and release the mouse button. Once the area is highlighted click on "Save".
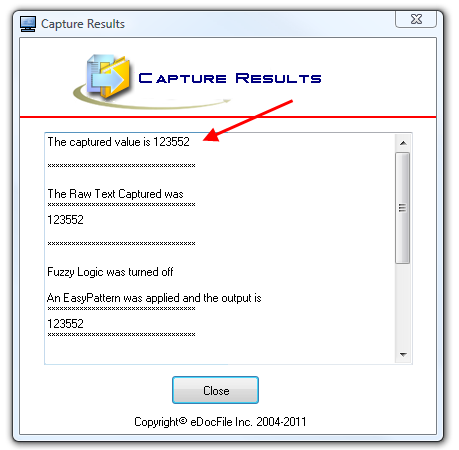
The captured results will be displayed check to see if they are correct. Click on "Close" to close the window. If the results are correct continue. If not, change the area by repeating the process. If the image quality is poor it maybe necessary to use "Fuzzy Logic" to correct the errors. More on Fuzzy Logic and Easy Patterns can be seen by clicking on the question marks on the window.
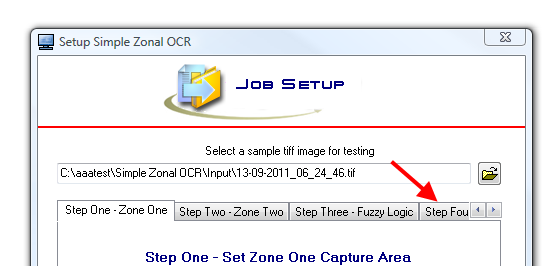
In this example only one zone is going to be captured and Fuzzy Logic is not being used. (it is highly recommended that they do be used to fine tune the program). Click on "Step Four" to skip Zone Two and Fuzzy Logic setup.
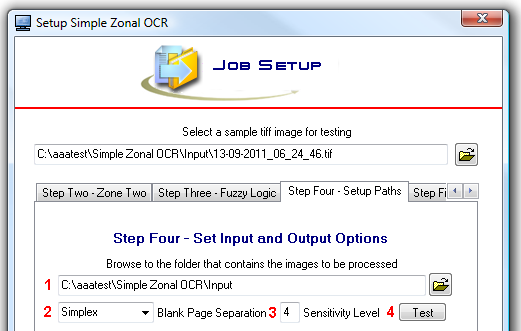
1 - Set the input folder (this will already be set if using the scanner).
2 - If using Blank Page Separation select which type "Simplex or Duplex". Simplex splits the file each time a blank page is found; duplex splits each time 2 or more blank pages are found.
3 - Set a Sensitivity Level for splitting. The level is based on 100 percent being 1000, so setting it at four as shown here makes it split if less that 4 tenths of one percent of the pixels are black. When using blank page separation, the scanner must be clean and the option (if available) to place a border on the image must be turned off.
4 - Click on "Test" to test the separation.
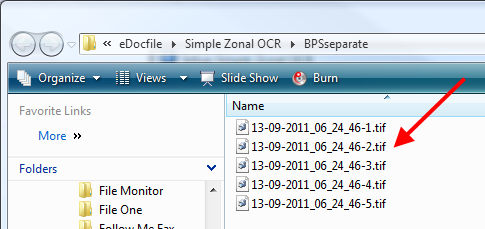
In this case the sample file was correctly separated into five sections. Continue entering the rest of the settings or if they were not split correctly, chane the Sensitivity Level and try again.
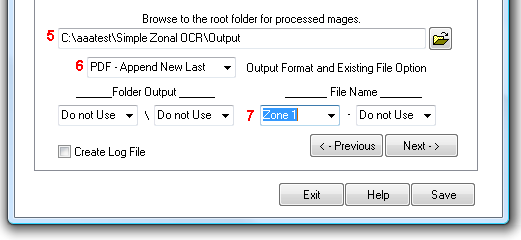
5 - Enter a folder for the processed images.
6 - Select what type of output (Tiff or PDF) and what to do if a file already exists with the same name.
7 - Select "Zone 1" to use as a file name.
When finished click on "Next" to go to the final step.
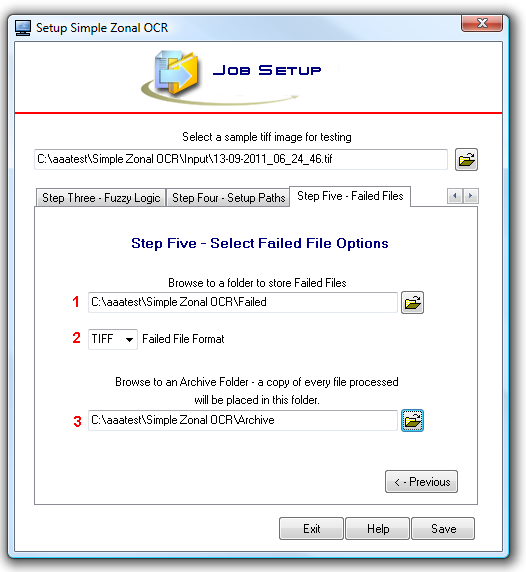
1 - Enter a folder for files that failed. (Keep in mind that this is for when the file fails to match an EasyPattern)
2 - Select a format for Failed Files. Even though PDFs can be selected, Tiffs are recommenced as they can later be checked for why they failed. Also, Manual Processing is transparent to the user as to file type being processed as a PDF and Tiff look the same in the viewer.
3 - Enter a storage location for a copy of every file that was placed in the input folder.
When finished click on "Save" to return to the Main Menu and the "Run Program" to begin processing.